


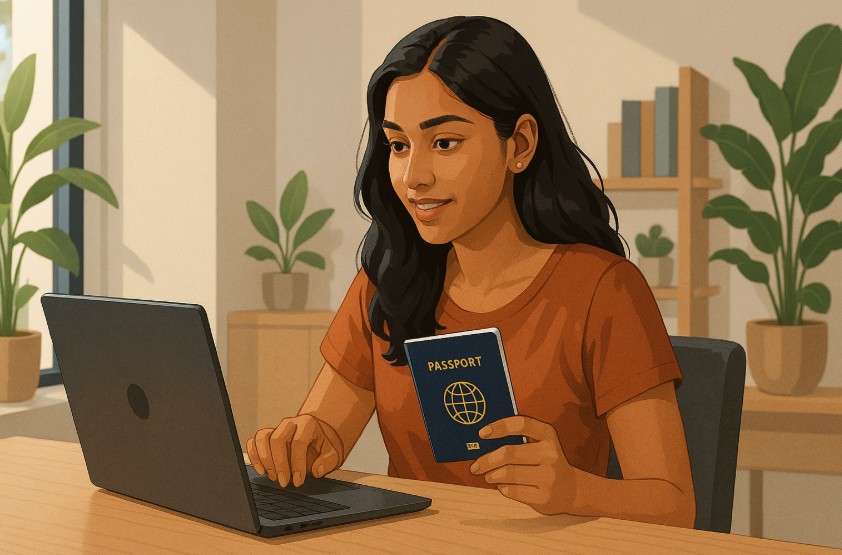
Are you planning an international trip and wondering how to apply for a passport in India? Navigating the passport application process can seem complicated at first, but with digital services like the Passport Seva Portal, getting your passport is now faster and more convenient than ever. Whether it’s for work, study, travel, or relocation, having a valid Indian passport is essential.
In this complete guide, you’ll learn how to register, apply online, schedule your appointment, and prepare your documents properly for both fresh and reissued passports. We break down each step clearly so you can avoid common mistakes and delays.
This guide also explains fees, police verification, and how to track your status, all explained in simple language so you know exactly what to expect. Ready to begin? Let’s dive into the full process of applying for an Indian passport with confidence.
What Is the Passport Seva Portal and Why Do You Need It?

The Passport Seva Portal is the official online platform introduced by the Government of India for all passport-related services. Whether you need a fresh passport, want to reissue one, or apply under the Tatkal scheme, everything starts here. It’s your one-stop solution for digital submission, fee payments, and appointment scheduling.
Using this portal helps eliminate manual paperwork and reduces the time taken to process applications. You can complete all the essential steps online, including filling in your personal information, uploading documents, and paying passport fees securely.
Once you’ve done this, you can book a slot at your nearest Passport Seva Kendra (PSK) or Post Office Passport Seva Kendra (POPSK). Without the Passport Seva Portal, you cannot initiate the official passport application process in India.
This portal ensures transparency, accuracy, and faster service by integrating applicant data with verification systems like Aadhaar and police records. Whether you’re applying for the first time or renewing, the portal is mandatory for tracking your application and receiving real-time updates through SMS or email.
How Do You Register on the Passport Seva Portal?
Before applying for your passport, you must register on the Passport Seva Portal. Registration is easy and takes only a few minutes if you follow the steps carefully.
Start by visiting the official website: passportindia.gov.in
Here’s how you can register:
- Click on the “Register Now” link on the homepage.
- Choose the Passport Office based on your current residential address.
- Enter your full name, date of birth, and email address.
- Set a login ID and password of your choice.
- Select a hint question and answer for password recovery.
- Enter the characters displayed in the CAPTCHA box.
- Submit the form by clicking Register.
Once you’ve completed registration, you will receive a confirmation email. Click the verification link in the email to activate your account. After account activation, you can log in using your ID and password.
This login is essential for accessing the application form, paying fees, and scheduling appointments. Remember to use a valid and active email ID since all official communication will be sent there.
Your account will store your application details, payment status, and appointment history securely for future use. Registering correctly is the first step toward a smooth passport application process.
How to Apply for a Fresh or Re-Issued Passport Online?

Once you’re registered, the next step is to apply for a passport. Whether you’re applying for a new (fresh) passport or a reissue, the process is similar, but the selection must be accurate at the start.
Selecting the Right Application Type
After logging into the Passport Seva Portal:
- Click on “Apply for Fresh Passport/Re-issue of Passport”.
- Choose “Fresh” if you’ve never had a passport before in that category (Ordinary, Diplomatic, or Official).
- Choose “Re-issue” if your passport has expired, is damaged, lost, or needs an update (like name or address change).
- Be cautious: selecting the wrong type could delay processing or result in rejection.
Filling the online passport application form
Once the type is selected:
- Fill in personal details: full name, date of birth, gender, and marital status.
- Provide current address and contact details.
- Select your passport preferences, 36 or 60 pages, Normal or Tatkal service.
- Mention employment and educational background.
- Review all fields before submitting, you cannot make changes once submitted.
You will now proceed to payment and appointment scheduling, but here’s a quick breakdown of the flow:
| Step | Action |
| 1 | Login to Passport Seva Portal |
| 2 | Select application type |
| 3 | Complete personal details |
| 4 | Save and review the form |
| 5 | Proceed to payment and booking |
Submitting your application correctly avoids unnecessary rework or delays.
What Documents Are Required for an Indian Passport Application?
Providing the correct documents is a crucial part of your passport application. The required documents vary based on your age group, application type (Fresh or Re-issue), and service category (Normal or Tatkal).
Below is a comprehensive table breakdown for Adults and Minors:
| Applicant Type | Category | Accepted Documents |
| Adult | Proof of Address (any one) | Aadhaar Card – Voter ID – Electricity or Water Bill – Bank Statement – Registered Rental Agreement |
| Proof of Date of Birth | Birth Certificate – PAN Card – 10th Class Certificate – Aadhaar Card (if DoB mentioned) | |
| Proof of Identity | Aadhaar Card – Voter ID – Driving License – PAN Card | |
| Proof for Non-ECR Category | 10th Pass Certificate or higher education certificate | |
| Additional (if applicable) | Annexure E (Self-declaration form) | |
| Minor | Date of Birth Proof | Birth Certificate (mandatory) |
| Proof of Address (Parent’s) | Aadhaar Card – Voter ID – Electricity or Water Bill (in parent’s name) | |
| Supporting Documents | Copy of Parent’s Passport (if available) – Annexure D (Declaration by parents) – Passport-size photograph (4.5 cm x 3.5 cm, white background) |
Quick Notes:
- All submitted documents must be self-attested.
- Carry both originals and photocopies to the Passport Seva Kendra (PSK) or Post Office PSK (POPSK).
- Ensure all documents are accurate and match your application details.
- Incomplete or mismatched documents can result in rejection or a need to revisit the PSK.
Double-check everything before your appointment, documents are the foundation of the passport approval process.
How Much Is the Passport Fee in India?

Passport application fees in India depend on the number of pages, type of passport (Normal or Tatkal), and the applicant’s age. The fee structure is clearly defined and must be paid online before booking your appointment.
Fee Table for Different Categories (Normal vs Tatkal, Minor vs Adult)
| Passport Type | Pages | Age Group | Normal Fee | Tatkal Fee |
| Fresh/Re-issue | 36 | Adult | ₹1,500 | ₹3,500 |
| Fresh/Re-issue | 60 | Adult | ₹2,000 | ₹4,000 |
| Fresh/Re-issue | 36 | Minor | ₹1,000 | ₹3,000 |
The Tatkal service is ideal if you need a passport urgently. It has a higher fee but offers faster processing, typically within 1–3 working days.
Online Payment Options
Payment must be made online through the Passport Seva Portal using one of the following methods:
- Debit or Credit Card (Visa or MasterCard)
- Net Banking (SBI and other banks)
- SBI Bank Challan (requires physical submission at SBI)
After payment, an Application Reference Number (ARN) will be generated. This is essential for tracking and appointment booking. No application is processed without full payment confirmation.
Ensure the payment is successful and receipt is generated. You do not need a physical printout — an SMS confirmation is also accepted during your PSK visit.
How to Schedule Your Passport Appointment Successfully?
After submitting your application and paying the required fee, the next step is to schedule an appointment at your nearest Passport Seva Kendra (PSK) or Post Office Passport Seva Kendra (POPSK). This step is crucial because without a confirmed appointment, your application cannot proceed.
Once logged in to the Passport Seva Portal, go to the “View Saved/Submitted Applications” section and click on “Pay and Schedule Appointment.” You’ll be prompted to choose your preferred PSK or POPSK based on your location. The system will then display available dates and time slots.
Choose a convenient slot and confirm your booking. A confirmation message with your Appointment Reference Number (ARN) and details will be sent via SMS and email. You do not need to print this receipt anymore, as the SMS confirmation is sufficient proof.
Key tips for scheduling:
- Book early to get preferred slots
- Avoid peak travel seasons to reduce wait times
- Keep your phone number and email up to date
If you miss your appointment or fail to visit within 90 days, you must resubmit your application. You are allowed to reschedule or cancel your appointment twice within one year of your original appointment. Proper appointment scheduling ensures a smooth and stress-free application process.
What Happens at the Passport Seva Kendra Visit?
Visiting the PSK or POPSK is where you complete the most important part of the passport process: verification. This appointment must be attended in person and cannot be delegated.
On your appointment day, reach the center at least 15–30 minutes in advance. Carry all original documents along with self-attested photocopies. You must also bring your Application Reference Number (ARN) or show the SMS confirmation.
At the center, your visit will go through these counters:
- Counter A: Document verification and biometrics
- Counter B: Officer verification (checking documents in detail)
- Counter C: Granting Officer approval and final processing
Your fingerprints, photograph, and digital signature will be captured. If any document is missing or mismatched, you may be asked to rebook or provide clarification. Minor applicants below 4 years must carry a recent passport-sized photo as biometric capture is optional.
Make sure:
- Documents match details on your application
- You carry both originals and copies
- Your mobile is active for OTPs or updates
The entire process may take 1 to 2 hours, depending on the queue. At the end, you’ll receive a confirmation slip. This means your application is successfully submitted and will move to the next stage.
Is Police Verification Mandatory for All Passport Applications?

Police verification is a crucial step in the passport issuance process in India. It helps verify your residential address, criminal background, and authenticity of the details provided in your application.
For most fresh passport applications, police verification is mandatory. For reissue applications, verification may be waived based on prior records, especially if there are no changes in address or identity. The type of service selected (Normal or Tatkal) can also influence whether verification is done before or after the passport is issued.
The police from your local jurisdiction will visit your residence, usually within 3 to 10 working days after your PSK appointment.
They will verify:
- Your identity
- Residential address
- Submitted documents
Keep the following ready during police visit:
- Self-attested copies of ID and address proof
- A passport-size photo (for police records)
- Any supporting annexures if required
You will receive an SMS update once the police report is submitted. If the verification is negative or incomplete, your application may be put on hold or rejected.
To avoid delays:
- Be available at the mentioned address
- Inform family members about the visit
- Cooperate with the officer for faster processing
Timely and clean police verification ensures your passport is processed without hurdles.
How to Track the Status of Your Passport Application?
Once your passport application has been submitted and verified, you can easily track its status online through the Passport Seva Portal. This helps you stay informed about your application progress and delivery timelines.
Here’s how to track it:
- Visit passportindia.gov.in
- Click on “Track Application Status” in the main menu
- Enter your Application Reference Number (ARN) or File Number
- Provide your Date of Birth and click “Track Status”
You’ll be shown real-time updates like:
- Application submitted
- Under review
- Police verification in progress/completed
- Passport printing initiated
- Passport dispatched with tracking number
Once dispatched, your passport is sent via India Post to the address mentioned in your application. You’ll receive an SMS with the tracking number to monitor delivery status.
Tips for tracking:
- Check status daily after police verification
- Keep your mobile number active
- If you miss delivery, collect it from the local post office with valid ID
Delays may occur due to incomplete police verification or high volume during peak periods. If your application is stuck, contact the passport helpline or visit the RPO for assistance. Tracking keeps you in control until the passport reaches your hands.
What’s the Difference Between a Normal and Tatkal Passport?

When applying for an Indian passport, you have two service options Normal and Tatkal. The difference lies in processing time, fees, and urgency.
The Normal passport service is for general applicants who do not need their passport urgently. It usually takes around 30 days, including police verification and processing.
The Tatkal passport service is for urgent situations like travel emergencies, job offers abroad, or last-minute visas. This service delivers your passport in 1 to 3 working days after successful verification. It involves a higher fee but significantly faster processing.
Here’s a quick comparison:
- Tatkal is faster but costlier
- Normal requires full police verification first
- Tatkal may allow post-police verification
- Tatkal requires Annexure F and Identity Certificate in some cases
Tatkal applicants need to provide additional documents proving urgency and may face stricter scrutiny. Still, it is the best option for emergency needs.
Select Tatkal only if truly necessary. Misuse of the fast-track route without valid justification may lead to rejection or future complications. Choosing between Normal and Tatkal should depend on your timeline, budget, and availability of documents.
Can You Apply for a Passport Without a Local Address?
Yes, you can apply for a passport even if you don’t have a local address in the city where you’re applying. Thanks to the “Apply Anywhere in India” scheme by the Ministry of External Affairs, Indian citizens can now apply for a passport from any Passport Seva Kendra or Post Office Passport Seva Kendra irrespective of their current residential address.
This is especially helpful for working professionals, students, or tenants living away from their permanent homes. You just need to provide valid proof of your current address, even if it’s temporary. Acceptable documents include rental agreements, utility bills, or employer’s certificate.
Police verification will still be done at the current address provided. So make sure the address you mention in your application is one where you are currently staying and can be reached by the police officer. The scheme improves flexibility and makes the process accessible across India without location-based limitations.
Conclusion
Applying for a passport in India has become a streamlined and efficient process, thanks to digital services and centralized systems like the Passport Seva Portal. From registration and document submission to police verification and tracking, each step is well-defined and user-friendly when followed correctly.
By ensuring that your documents are accurate, your appointment is confirmed, and you’re available for police verification, you significantly reduce the risk of delays or rejections. Whether you’re a first-time applicant or looking to reissue an old passport, staying organized is key.
The Normal and Tatkal services provide options based on urgency, and the ability to apply from anywhere in India adds further convenience. Use this guide as your go-to resource, and you’ll find the process easier than expected. Start early, double-check your application, and soon, your Indian passport will be ready for the world.
FAQs
How long does it take to get a passport in India?
In normal cases, it takes 30 days. Tatkal services can deliver passports within 1 to 3 working days.
Can I apply for a passport without proof of address?
You can, if you provide a valid temporary address along with supporting documents like rental agreement or utility bills.
What if I miss my passport appointment?
You must reschedule it within one year. If you exceed the limit or fail to visit in 90 days, you must reapply.
Can minors apply for passports without both parents?
At least one parent must accompany the child. A declaration form (Annexure D) and their passport copies are usually required.
Is Aadhaar enough for passport application?
Aadhaar is generally accepted as ID and address proof, but additional documents like birth certificate may still be needed.
Do I need to carry photos for PSK visit?
Photos are usually taken at the center. For minors under 4 years, a passport-size photo must be brought.
How can I reschedule my passport appointment online?
Login to the Passport Seva Portal and go to Schedule Appointment to change the date. You can reschedule only twice per year.